
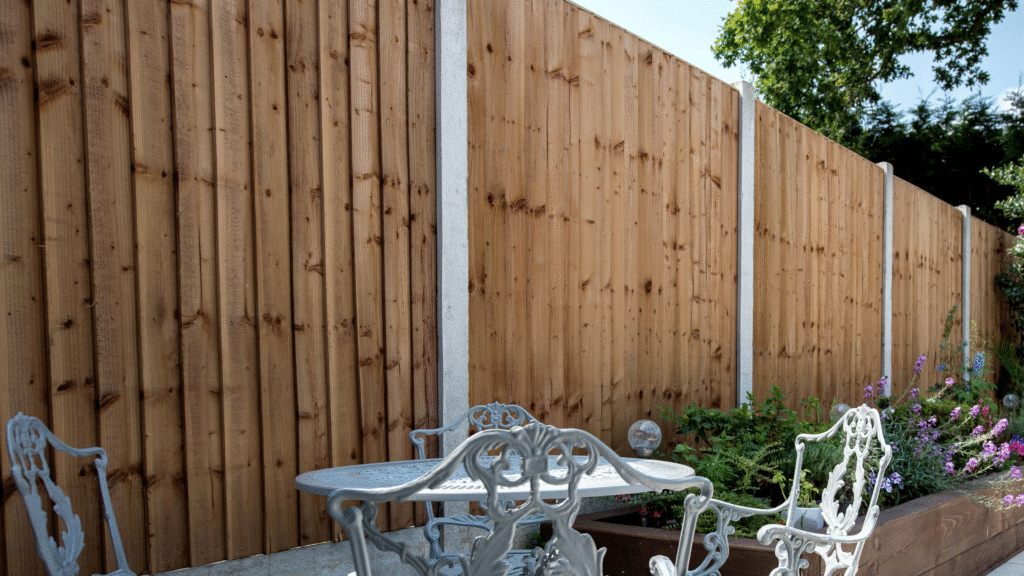
A sturdy and long-lasting fence is more than just a boundary; it’s an investment in your property’s security, privacy, and curb appeal. The backbone of any resilient fence is its posts, and the method you choose to anchor them can mean the difference between a fence that stands tall for decades and one that succumbs to the elements within a few short years. While various methods exist, setting fence posts in concrete remains the gold standard for achieving unparalleled strength and longevity.
This comprehensive guide will walk you through every critical step and consideration for setting fence posts in concrete, ensuring your project is a resounding success. From the initial planning and material selection to the final finishing touches, we will delve into the professional techniques and insider tips that will empower you to build a fence that will truly stand the test of time.
Chapter 1: The Bedrock of Success – Planning and Preparation
Before a single shovel of dirt is turned, meticulous planning and preparation are paramount. This foundational stage will save you time, money, and countless headaches down the road.
Know Before You Dig: Property Lines and Local Regulations
One of the most costly and frustrating mistakes in fence installation is ignoring property lines and local regulations. A fence built on a neighbor’s property can lead to legal disputes and forced removal.
- Property Survey: Obtain a copy of your property survey to accurately identify your property boundaries. If you don’t have one, consider hiring a professional surveyor.
- Local Ordinances: Contact your local municipality or homeowners’ association to inquire about any regulations regarding fence height, materials, and setback requirements from property lines. Some areas may also require a building permit for fence installation.
- Call Before You Dig: Before any excavation, it is crucial to call 811, the national “call before you dig” hotline. This free service will arrange for utility companies to mark the location of any underground lines, such as gas, water, and electricity, preventing a potentially dangerous and expensive accident.
Choosing Your Warriors: Selecting the Right Posts and Concrete
The materials you choose are just as important as the installation process itself. Opting for high-quality posts and the appropriate concrete mix will lay the groundwork for a durable fence.
How to Set a Post for a Fence or Deck
Post Selection: A Matter of Material
- Pressure-Treated Wood: This is a popular and cost-effective option. The wood is infused with chemical preservatives to resist rot and insect damage. For in-ground use, ensure the posts are rated for “ground contact.”
- Cedar and Redwood: These woods are naturally resistant to rot and insects, making them an excellent, albeit more expensive, choice.
- Steel and Aluminum: Metal posts offer exceptional strength and durability, and are not susceptible to rot or insect damage. They are a great choice for high-stress areas like gates and corners.
- Vinyl and Composite: These low-maintenance options are resistant to rot, insects, and fading. While the initial cost may be higher, their longevity and minimal upkeep can make them a worthwhile investment.
The Perfect Pour: Understanding Concrete Mixes
Not all concrete is created equal. Choosing the right mix for your fence posts is essential for achieving optimal strength and setting time.
- Standard Concrete Mix: This is a basic blend of cement, sand, and gravel that you mix with water. It is a cost-effective option for large projects but requires more effort and has a longer curing time. A common ratio for mixing your own is 1 part cement, 2 parts sand, and 3 parts gravel.
- Fast-Setting Concrete Mix: As the name suggests, this mix is formulated to harden rapidly, often within 20 to 40 minutes. This is a convenient option that allows you to move on to the next post quickly without the need for extensive bracing. Simply pour the dry mix into the hole and add water.
- High-Strength Concrete Mix: For areas with heavy loads, high winds, or unstable soil, a high-strength concrete mix provides superior durability and structural integrity.
- Fiber-Reinforced Concrete: This type of concrete contains small synthetic or steel fibers that increase its resistance to cracking and impact, further enhancing the longevity of your fence posts.
Chapter 2: The Art of the Hole – Digging for Durability
The dimensions and preparation of your post holes are critical factors that directly impact the stability and lifespan of your fence.
Depth and Diameter: The Rules of Thumb
- The One-Third Rule: A widely accepted guideline is to bury at least one-third of the post’s total length in the ground. For example, for a 6-foot tall fence, you will need an 8-foot post, with 2 feet buried in the ground.
- Frost Line Considerations: In colder climates, it is crucial to dig your post holes below the frost line. The frost line is the depth to which the ground freezes in the winter. If your post footings are above the frost line, the freezing and thawing of the soil can cause the posts to heave and shift. Check with your local building department for the frost line depth in your area and dig at least 6 inches deeper.
- Hole Diameter: The diameter of your post hole should be approximately three times the width of the post. For a 4×4 post (which is actually 3.5 x 3.5 inches), a hole with a diameter of 10 to 12 inches is ideal. A wider hole allows for a sufficient amount of concrete to surround the post, creating a strong anchor.
Shaping for Strength: The Bell-Shaped Hole
For maximum stability, especially in loose or sandy soil, consider digging a bell-shaped hole. This means the bottom of the hole is wider than the top. This shape creates a wider base for the concrete footing, making it more resistant to being pulled out of the ground or shifting due to wind or other forces.
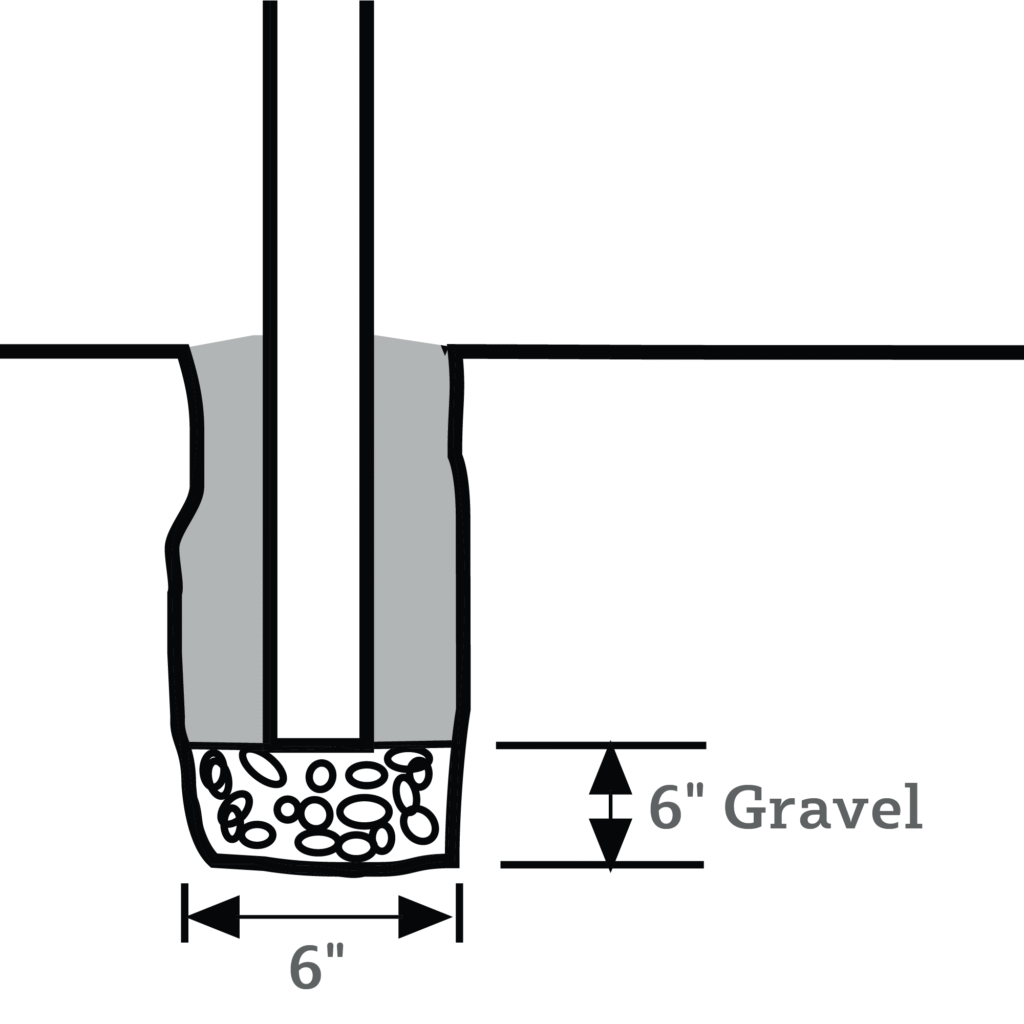
The Unsung Hero: The Gravel Base
Before setting your post and pouring the concrete, adding a layer of gravel at the bottom of the hole is a crucial step that should not be overlooked.
- Promotes Drainage: A 4 to 6-inch layer of gravel or crushed stone at the base of the hole allows water to drain away from the bottom of the post. This is especially important for wooden posts, as it helps to prevent moisture from accumulating and causing rot.
- Provides a Stable Base: The gravel provides a solid, level base for the post to rest on and helps to distribute the load more evenly. Tamp the gravel down firmly before setting the post.
Chapter 3: The Main Event – Setting Your Posts in Concrete
With your holes dug and prepped, it’s time for the most critical phase: setting the posts in concrete.
Positioning and Bracing: Ensuring a Plumb Post
A perfectly vertical post is essential for a professional-looking and structurally sound fence.
- Center the Post: Place the post in the center of the hole on top of the compacted gravel base.
- Use a Level: Use a post level or a standard level on two adjacent sides of the post to ensure it is perfectly plumb (vertical).
- Brace for Stability: Once the post is plumb, secure it in place with temporary braces. You can create simple braces using 2x4s attached to the post and staked to the ground. This will hold the post in the correct position while you pour and cure the concrete.
Mixing and Pouring: The Concrete Application
The method for mixing and pouring will depend on the type of concrete you are using.
- Fast-Setting Concrete: For fast-setting mixes, you can typically pour the dry mix directly into the hole around the post. Fill the hole to about 3 to 4 inches below ground level. Then, add the amount of water specified on the bag.
- Standard Concrete Mix: If you are using a standard mix, you will need to mix the concrete with water in a wheelbarrow or a concrete mixer before pouring it into the hole. The ideal consistency should be similar to thick oatmeal – not too soupy and not too dry.
Finishing Touches for Longevity
A couple of final steps before the concrete sets will add years to the life of your fence.
- Slope the Concrete: As you fill the hole, and before the concrete begins to harden, shape the top of the concrete so that it slopes away from the post. This will create a “collar” that directs water away from the base of the post, preventing it from pooling and causing rot.
- Leave Room for Backfill: Do not fill the concrete all the way to the top of the hole. Leaving the concrete level 3 to 5 inches below the ground surface allows you to backfill with soil and sod, creating a cleaner look and helping to prevent frost heave.
The Waiting Game: Curing for Strength
Curing is the chemical process through which concrete hardens and gains strength. While fast-setting concrete may be firm to the touch in under an hour, it’s crucial to allow adequate curing time before putting any stress on the posts, such as attaching fence panels.
- Initial Set: Most standard concrete mixes will have an initial set within 24 to 48 hours, at which point it is safe to remove the braces.
- Full Cure: Concrete continues to cure and gain strength for weeks. It is generally recommended to wait at least 3 to 7 days before attaching fence panels or gates. For full structural strength, concrete can take up to 28 days to cure completely. Always follow the manufacturer’s instructions for the specific concrete mix you are using.
Chapter 4: Advanced Techniques and Troubleshooting
For those seeking the absolute pinnacle of fence post longevity, and for dealing with common issues, here are some advanced techniques and troubleshooting tips.
Preventing Post Rot: A Proactive Approach
For wooden posts, the area at ground level is the most vulnerable to rot. Concrete can trap moisture against the wood, accelerating decay if not properly addressed.
- Waterproof Barrier: Consider applying a waterproof sealant or a thick coat of asphalt emulsion to the portion of the post that will be in contact with the concrete and soil. This creates a barrier against moisture.
- Post Protection Sleeves: These are sleeves that you can place around the base of the post before installation. They create a physical barrier between the wood and the surrounding soil and concrete, effectively preventing rot at the ground line.
Dealing with Challenging Soil Conditions
- Loose or Sandy Soil: In unstable soil conditions, it’s essential to dig wider and deeper holes to create a more substantial concrete footing. Using a bell-shaped hole is also highly recommended in these situations.
- Clay Soil: Clay soil can hold a lot of moisture. Ensuring proper drainage with a generous gravel base is critical.
Common Mistakes to Avoid
Even with the best intentions, several common mistakes can compromise the integrity of your fence.
- Incorrect Measurements and Layout: “Measure twice, cut once” is a golden rule for a reason. Inaccurate measurements can lead to an uneven fence and wasted materials.
- Inadequate Post Hole Depth: Shallow post holes are a primary cause of leaning and failing fences.
- Insufficient Concrete: Skimping on concrete will result in weak post support. For a standard-sized yard, you can expect to use a significant amount of concrete.
- Ignoring Changes in Elevation: If your yard has slopes or uneven terrain, you’ll need to account for these changes when setting your posts to maintain a straight and level fence line.
- Rushing the Process: Taking the time to properly plan, measure, and install your fence posts will pay dividends in the long run.
Conclusion: A Legacy of Strength
Setting fence posts in concrete is a labor of love that rewards you with a fence that is not only beautiful and functional but also a lasting testament to your commitment to quality. By diligently following the steps outlined in this guide – from the crucial planning stages to the final curing of the concrete – you are empowering yourself to build a fence with a foundation of unwavering strength. Remember that the longevity of your fence is directly tied to the care and attention to detail you invest in its installation. With a solid concrete anchor, your fence will be well-equipped to withstand the forces of nature and provide you and your family with security, privacy, and peace of mind for a lifetime.


