
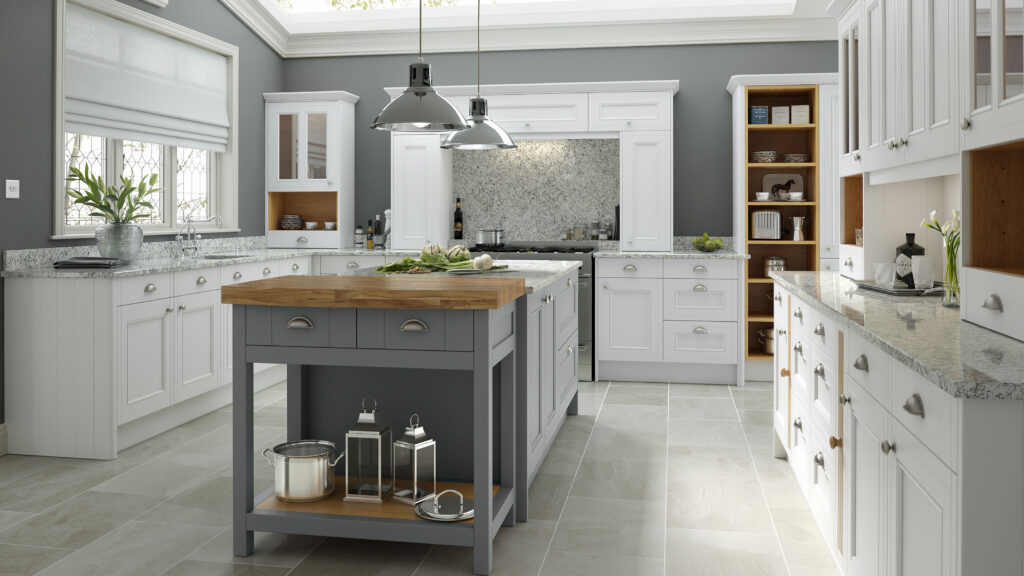
Let’s be honest. You’ve scrolled through Pinterest, you’ve binge-watched the home renovation shows, and you’ve developed a serious case of kitchen envy. You dream of clean countertops, stylish cabinets, and a space that feels fresh, functional, and uniquely you. Then, you look at the price tags. A standard kitchen remodel can easily soar to $25,000, $50,000, or even six figures. The dream deflates, replaced by the grim reality of your dated, dysfunctional kitchen.
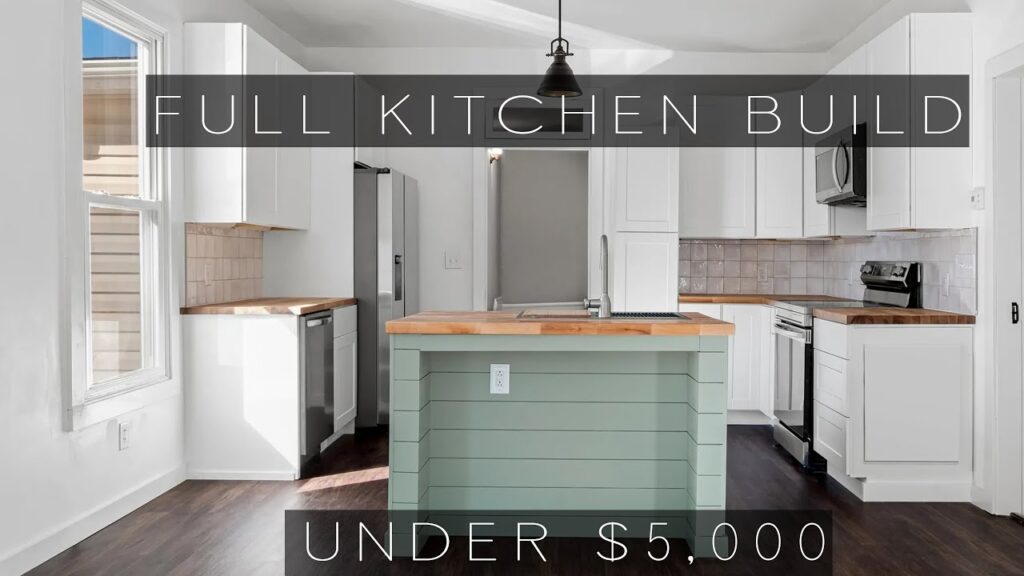
But what if I told you that a dramatic, jaw-dropping kitchen transformation is not only possible but completely achievable for less than the cost of a used car? What if you could get that “after” photo feeling for a budget of just $5,000?
It’s not a fantasy. It’s a strategy. It requires planning, patience, and a healthy dose of what we call “sweat equity.” This isn’t a guide about cutting corners; it’s about making smart, high-impact choices. We’re going to trade high labor costs for your own time and effort, and expensive custom materials for clever, budget-friendly alternatives that look a million bucks.
This is your definitive 5,000-word roadmap. We will walk you through every single stage, from the crucial mindset shift and meticulous planning to the nitty-gritty details of transforming your cabinets, countertops, floors, and more. Get ready to roll up your sleeves and build the kitchen you’ve been dreaming of.
Chapter 1: The Mindset Shift: From “Dream Kitchen” to “Smart Kitchen”
Before you pick up a single tool, we need to perform a mental renovation. The key to a successful budget remodel is to stop chasing the “magazine kitchen” and start designing a “smart kitchen.
A $5,000 budget is not for moving walls, re-routing plumbing, or buying a full suite of professional-grade appliances. Trying to do so will only lead to a half-finished, frustrating mess. Instead, our entire philosophy is built on this principle
Work with the bones of what you have.
Your mission is to identify the strongest features of your current kitchen and amplify them, while strategically upgrading the weakest, most dated elements. This means accepting and embracing your kitchen’s existing layout. The sink, dishwasher, stove, and refrigerator are staying where they are. This single decision saves you thousands of dollars in plumbing, electrical, and cabinetry costs right off the bat.
Our strategy is to focus on the cosmetic surfaces, which account for 80% of the visual impact of your kitchen. We’re going to focus our budget and effort on the things you see and touch every single day:
- Cabinets: The dominant visual feature.
- Countertops: The primary workspace.
- Backsplash: The kitchen’s personality.
- Walls & Flooring: The canvas for the whole room.
- Lighting & Hardware: The jewelry that makes everything sparkle.
By focusing on these five areas, you can achieve a radical transformation without touching the expensive infrastructure of your kitchen.
Chapter 2: The Master Plan: Your Blueprint for Success
“Failing to plan is planning to fail.” This cliché is the gospel truth for a budget renovation. You cannot “wing it” on a $5,000 budget. Every single dollar must have a job.
Step 1: Create Your Line-Item Budget
Open up a spreadsheet or grab a notebook. You are now the Chief Financial Officer of your kitchen project. List out every potential expense. Be ruthlessly detailed.
The Golden Rule: The 15% Contingency Fund
Before you allocate a single penny to paint or tile, set aside 15-20% of your total budget as a contingency fund. For a
5,000budget,thisis∗∗5,000 budget, this is **5,000budget,thisis∗∗750 – $1,000**. This is non-negotiable. Unexpected problems will happen: you’ll need a specific tool you didn’t anticipate, a plumbing valve under the sink will break when you try to replace the faucet, or you’ll underestimate the amount of primer you need. This fund turns a project-killing catastrophe into a manageable inconvenience.
With our contingency set at
750,wenowhave∗∗750, we now have **750,wenowhave∗∗4,250** to work with for the actual renovation.
Sample $5,000 DIY Kitchen Budget Breakdown
This is an example allocation. Your numbers will shift based on your kitchen’s size and your priorities, but this is a realistic starting point.
- Contingency Fund (15%): $750
- Remaining Project Budget: $4,250
| Category | Estimated Cost | Percentage of Budget | Notes |
| 1. Cabinets (Paint & Hardware) | $500 | 11.8% | High-quality primer, paint, brushes, rollers, new knobs/pulls. |
| 2. Countertops | $1,200 | 28.2% | Laminate, butcher block, or large-format tile options. |
| 3. Backsplash | $400 | 9.4% | Classic subway tile, adhesive, grout, and tool rental. |
| 4. Sink & Faucet | $450 | 10.6% | A quality drop-in stainless sink and a stylish pull-down faucet. |
| 5. Flooring | $700 | 16.5% | Luxury Vinyl Plank (LVP) for an average-sized kitchen. |
| 6. Paint & Primer (Walls) | $150 | 3.5% | One gallon of quality ceiling paint, one gallon of wall paint. |
| 7. Lighting | $300 | 7.1% | A new main ceiling fixture and plug-in under-cabinet LED strips. |
| 8. Tools & Supplies | $550 | 12.9% | Sander, drill bits, caulk, tape, drop cloths, tile saw rental, etc. |
| TOTAL | $4,250 | 100% |
Step 2: Create Your Project Timeline
Map out the order of operations to avoid re-doing work. A logical flow looks like this:
- Week 0: Planning & Purchasing. Finalize your design choices, measure everything twice, and order/purchase all your materials.
- Day 1: Demolition & Prep. Clear the kitchen, remove cabinet doors, take down the old backsplash, and prep the walls.
- Day 2-5: The Cabinet Transformation. This is the most time-consuming step. Cleaning, sanding, priming, and painting all the cabinet boxes and doors.
- Day 6: Wall Painting. With cabinets prepped, paint the ceiling and walls.
- Day 7-8: Flooring Installation. Install your new LVP flooring.
- Day 9-10: Countertop Installation. If you chose butcher block or laminate, this is your weekend to install it.
- Day 11: Sink & Faucet Installation.
- Day 12-13: Backsplash Tiling. Set the tile, let it dry overnight, then grout and seal.
- Day 14: The Final Touches. Install new lighting, re-hang cabinet doors with new hardware, install outlet covers, and perform a final clean-up.
This is an aggressive two-week timeline for someone working on it consistently. Realistically, for someone working on weekends and evenings, this could be a 4-6 week project.
Chapter 3: The Biggest Bang for Your Buck: A Cabinet Transformation
Your cabinets are the face of your kitchen. If they are dated, the entire room feels dated. Replacing them would consume your entire budget and then some. Thankfully, you can achieve a factory-finish look with paint and patience.
Estimated Cost: $500 (Includes paint, primer, supplies, and new hardware)
Time Commitment: 4-5 days (This is the longest part of the project)
The Step-by-Step Guide to Flawless Painted Cabinets
Do not skip a single one of these steps. Your results are directly proportional to your prep work.
- Empty and Label. Remove everything from your cabinets. Using masking tape and a marker, label every single door and drawer front with its corresponding location (e.g., “Above Sink Left,” “Top Drawer Right of Stove”). This is a lifesaver during reassembly.
- Remove Doors and Hardware. Carefully remove all doors, drawers, and hardware. Place all the screws and hinges in labeled plastic bags.
- The Deep Clean (The Most Important Step). Kitchen cabinets are coated in years of aerosolized grease and grime, which is the mortal enemy of paint adhesion.
- Buy a strong degreaser like Trisodium Phosphate (TSP) or a TSP substitute.
- Mix it according to the directions and, using a scrub sponge, thoroughly scrub every square inch of the cabinet boxes, doors, and drawer fronts.
- Rinse with a clean, damp cloth and let everything dry completely.
- Sand for Success. You are not sanding to remove the old finish, you are sanding to “scuff” the surface so the primer can grip it.
- Use 120-grit sandpaper or a sanding block. Lightly sand all surfaces. You’re done when the original sheen is gone and the surface feels slightly rough.
- Wipe away all sanding dust with a tack cloth or a damp microfiber cloth.
- Prime, Prime, Prime. Primer is the magic ingredient. It blocks stains, prevents bleed-through (especially on old oak cabinets), and provides a uniform surface for your paint.
- Choose a high-quality, stain-blocking bonding primer. Zinsser BIN Shellac-Based or INSL-X Stix are excellent choices.
- Apply a thin, even coat to everything. Use a small foam roller for flat surfaces and a quality angled brush for detailed areas.
- Let it dry completely (check the can for recoat times) and then apply a second thin coat. Don’t skip this. Two thin coats are far superior to one thick one.
- The Final Finish: Paint. Now for the transformation.
- Choose the Right Paint: You need a durable, self-leveling cabinet paint. Benjamin Moore ADVANCE or Sherwin-Williams Emerald Urethane Trim Enamel are top-tier products worth the extra cost. They dry to a hard, furniture-like finish.
- Application: Apply two to three thin coats of paint, allowing for proper drying time between each coat (this can be 2-16 hours, read the can!). A high-density foam roller will give you a smooth finish. For a near-professional look, consider investing in or renting an HVLP paint sprayer for the doors and drawers.
- Cure Time is Crucial. Your paint may be dry to the touch in a few hours, but it takes days or even weeks to fully cure and harden. Be gentle with your newly painted cabinets for the first 2-3 weeks to avoid dings and scratches.
- Install Your New Hardware. This is the “jewelry.” Replacing dated hardware with modern knobs or pulls is a small change with a massive impact. Measure the distance between the screw holes on your old hardware (center-to-center) to ensure your new hardware fits. If you’re switching from knobs to pulls, you’ll need a cabinet hardware jig to drill new holes accurately.
Chapter 4: Countertops Without the Custom Cost
New countertops are a cornerstone of a kitchen remodel. Granite and quartz are out of our budget, but there are fantastic, stylish alternatives that you can install yourself.
Estimated Cost: $800 – $1,500
Time Commitment: 1-2 days
Option 1: The Butcher Block Champion
Pros: Warm, natural look; relatively easy to cut and install for a DIYer; can be sanded and refinished if damaged.
Cons: Requires regular sealing with food-safe mineral oil or conditioner to prevent staining and water damage. Not scorch-proof.
Best For: Farmhouse, traditional, or eclectic styles. Unfinished butcher block slabs are available at stores like IKEA, Home Depot, and Floor & Decor.
Option 2: The Modern Laminate Marvel
Forget the 1980s laminate with the brown seams. Modern, high-definition laminate countertops are incredible mimics of stone, marble, and concrete.
Pros: Huge variety of styles; highly durable and stain-resistant; most affordable option; can be ordered in stock sizes.
Cons: Can be chipped; seams can be visible; not heat-resistant (always use a trivet).
Best For: Anyone looking for the stone look without the stone price. Many big-box stores offer installation, but for the DIYer, you can order custom-cut pieces and install them yourself.
Option 3: The Advanced DIY – Refinishing Kits
If your budget is extremely tight and your existing laminate countertops are in good structural shape, you can refinish them with an epoxy or stone-coating kit.
Pros: Extremely low cost (
200−200-200−400); can dramatically change the look of old countertops.
Cons: Process is messy and has a steep learning curve; durability can be questionable if not applied perfectly.
Best For: The patient, detail-oriented DIYer on a shoestring budget.
Chapter 5: The Backsplash: Adding Your Kitchen’s Personality
The backsplash is the perfect place to inject style and color. It’s a relatively small area, so you can often get a high-end look for a low cost. It’s also a fantastic entry-level tiling project.
Estimated Cost: $300 – $500
Time Commitment: 2 days
Option 1: The Timeless Classic – Subway Tile
There’s a reason it’s so popular. It’s clean, classic, and incredibly affordable (often less than $0.20 per tile).
DIY Tips: Use tile spacers for perfect grout lines. Rent a wet tile saw for a day for clean, accurate cuts around outlets and windows. Using a contrasting grout color (like gray or black with white tile) can create a bold, graphic look.
Option 2: The Easy Installer – Peel-and-Stick Tiles
These have come a long way. Made from vinyl or even thin layers of metal and stone, they are a fantastic option for the DIYer who is intimidated by traditional tile.
Pros: No mortar or grout needed; easy to cut with a utility knife; can be installed in an afternoon.
Cons: Can look less authentic than real tile; may not hold up as well in high-moisture areas behind the sink.
Option 3: The Rustic Charm – Beadboard or Shiplap
For a farmhouse or cottage look, installing panels of beadboard as a backsplash is quick, easy, and very inexpensive.
DIY Tips: Use a construction adhesive and a brad nailer to install. Be sure to caulk all the seams and finish with a durable, semi-gloss paint for easy cleaning.
Chapter 6: Floors, Walls, and Light: Setting the Stage
These background elements are what will make your new cabinets and countertops truly pop.
Walls: The Power of Paint
Estimated Cost: $150
A fresh coat of paint is the cheapest and fastest way to transform any room. For kitchens, choose a high-quality paint with an eggshell or satin finish, which is more durable and wipeable than a flat finish. Stick to light, neutral colors to make the space feel bigger and brighter, allowing your backsplash and countertops to be the stars.
Flooring: The Modern DIY Solution
Estimated Cost: $700 (for ~150 sq. ft. kitchen)
Old, cracked vinyl or stained tile can ruin the look of your newly renovated kitchen. The undisputed champion of DIY-friendly, budget-conscious flooring today is Luxury Vinyl Plank (LVP).
Why LVP is Perfect:
- 100% Waterproof: Ideal for a kitchen.
- Durable: Resists scratches and scuffs.
- Easy to Install: Most LVP is a “floating floor” with a click-lock system that can be installed right over your existing hard-surface floor (no demolition needed!). It can be cut with just a utility knife.
- Looks Great: Modern LVP comes in incredibly realistic wood and stone looks.
Lighting: The Game Changer
Estimated Cost: $300
A dated, grimy light fixture can make even the cleanest kitchen feel dingy.
- Overhead Lighting: Swap out that old fluorescent box light or “boob light” for a stylish semi-flush mount fixture or a simple track light. This is a basic electrical task that a confident DIYer can handle (always turn off the power at the breaker first!).
- Under-Cabinet Lighting: This is the secret to making a kitchen look high-end. It provides excellent task lighting for your countertops. You don’t need an electrician; easy-to-install plug-in LED light strips or puck lights are affordable and effective.
Chapter 7: The Functional Core: Sink, Faucet, and Appliances
These are the workhorses of your kitchen.
Sink & Faucet
Estimated Cost: $450
An old, stained sink and a leaky faucet can make the whole kitchen feel gross. A new, deep, single-basin stainless steel drop-in sink is a fantastic upgrade that makes washing large pots a breeze. Paired with a modern, high-arc pull-down faucet, it instantly modernizes the entire sink area. Replacing a drop-in sink and faucet is a straightforward DIY plumbing job.
The Appliance Conundrum
Estimated Cost: Variable / $0
This is the budget-breaker. A new suite of appliances would cost
3,000−3,000-3,000−4,000, blowing our entire budget. So, what’s our strategy?
- Work With What You Have. If your appliances are functional and in a neutral color (white, black, or stainless), keep them! A thorough, deep cleaning can make them look brand new.
- Unify with Paint or Film. If you have a mismatched set of appliances, you can create a cohesive look. There are special appliance epoxy paints and stainless steel vinyl films that can be used to change the color of a fridge or dishwasher front.
- Shop Scratch-and-Dent or Used. If one appliance is truly broken or hideous, look for a replacement at an appliance outlet store (for scratch-and-dent models) or on Facebook Marketplace. You can often find great deals on appliances from people who are doing a full remodel.
The goal is a clean, functional, and cohesive set—not necessarily a brand-new, matching one.
Chapter 8: Know When to Call a Pro: What NOT to DIY
Your safety and your home’s integrity are more important than your budget. Be honest about your skill level and always hire a licensed professional for:
- Moving Gas Lines: This is non-negotiable. Don’t do it.
- Major Electrical Work: Swapping a light fixture is one thing. Adding new circuits, moving outlets, or rewiring the panel requires a licensed electrician.
- Major Plumbing: Replacing a faucet is DIY. Moving the supply or drain lines in the wall is a job for a plumber.
- Structural Changes: Never remove a wall without consulting a structural engineer.
Factoring in a pro for a small job might eat into your contingency, but it’s far cheaper than fixing a fire or a flood.
Conclusion: You’ve Got This!
A $5,000 kitchen renovation is more than just a project; it’s a testament to the power of smart planning, creativity, and your own two hands. It’s about looking at the space you have, not as a limitation, but as a canvas.
By focusing on high-impact cosmetic changes—transforming your cabinets with paint, installing smart new countertops, adding a personality-packed backsplash, and tying it all together with fresh floors, paint, and lighting—you can achieve a radical transformation that rivals renovations costing five times as much.
It will take time. There will be moments of frustration. Your home will be a mess for a few weeks. But when you stand back in your finished kitchen, with a cup of coffee in your hand, looking at the beautiful, functional space that you created, the feeling of pride and accomplishment will be priceless. Now, go grab your tape measure. Your new kitchen is waiting.


